
Bot personnalisé Setup
In this article, you will find how to setup and use our Bot personnalisé package step by step. Vous pouvez setup your custom bot from both your mobile device and your computer by following the same steps here.
Settings
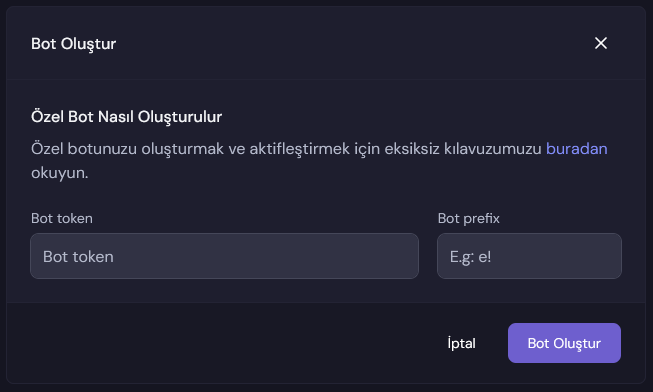
Once you have purchased your Bot personnalisé, you will see a screen like the one below.
-
From this screen, we will visit the Discord Developer Portal page to create votre bot's token.
-
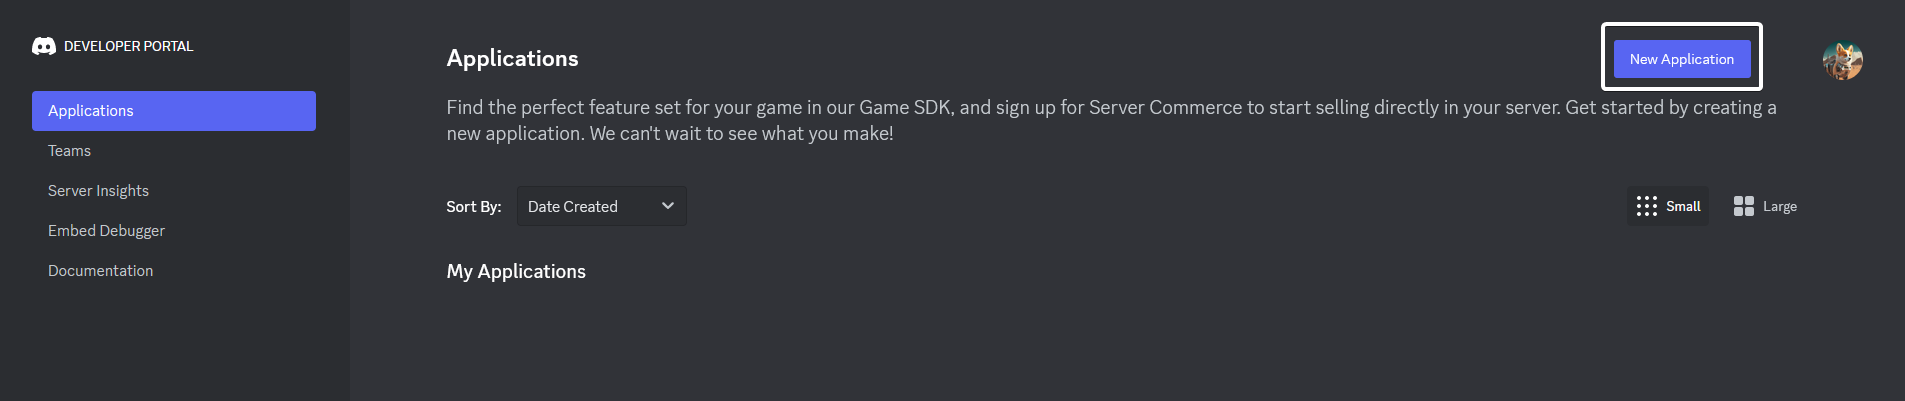
If you have not created a bot before, we create a new bot through the Discord Developer Portal by clicking on the "New Application" button.
-
After determining the name of votre bot from the screen that opens and accepting the terms of Discord, click on the "Create" button.
-
After completing the process, the first screen that appears will be the "General Information" category, where vous pouvez add votre bot's Profile Photo, About section.
-
After making the necessary paramètres, click on the "Bot" category from the tab that appears as the "Bot" category on your computer, and from the tab that opens when you click the button on the top left on your mobile device.
Running the Bot
After these steps, we will complete the remaining steps to run le bot. We continue all our operations from the same page.
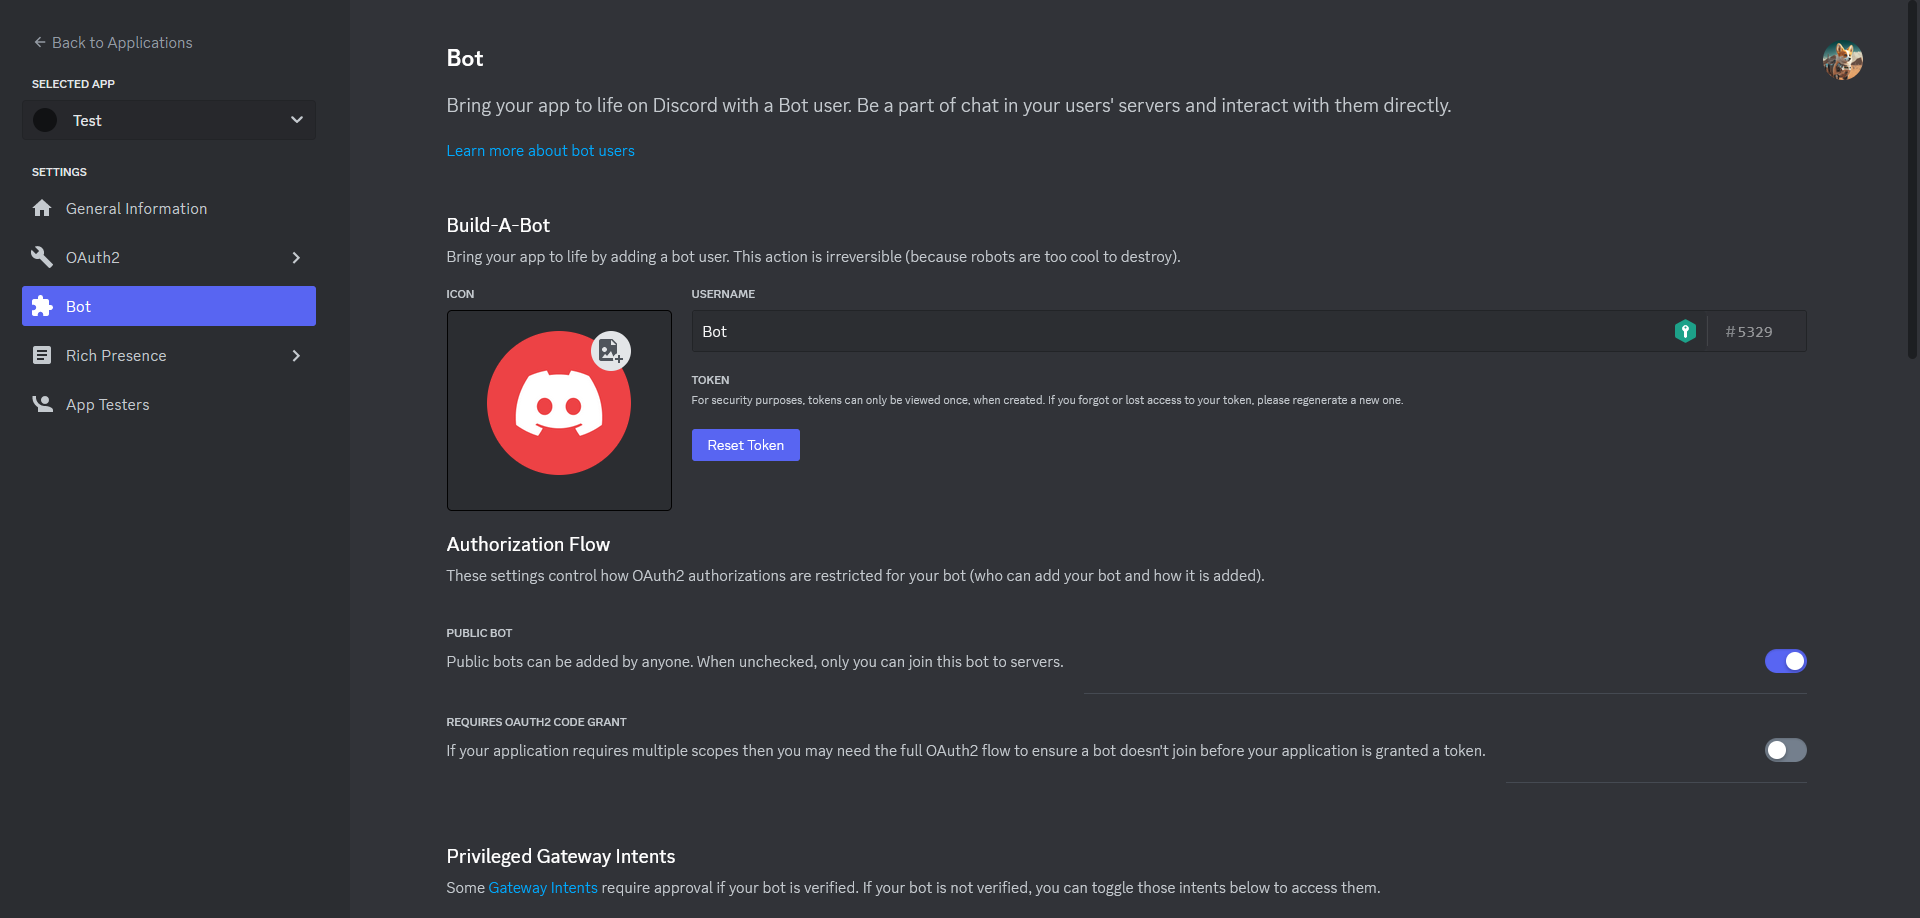
- When we click on le bot category, the screen that opens will look as follows.
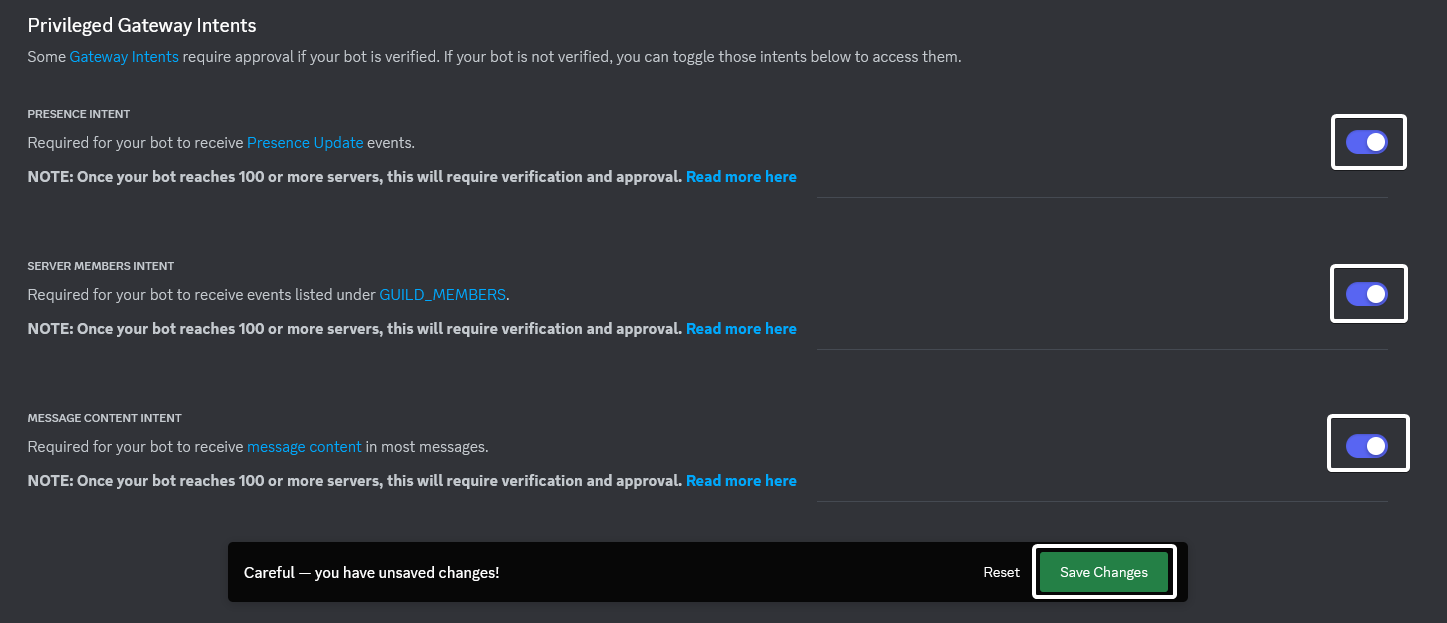
- The first thing we will do from here is to scroll down the page and activate and save the "Presence Intent", "Server Members Intent", "Message Content Intent" buttons under the "Privileged Gateway Intents" heading.
-
After activating the paramètres, we click the "Reset Token" button at the top of the page. Then we copy the Token that appears after confirming.
-
After copying the token, we go back to the first step from our administration panel, paste le bot's token here and set the Prefix.
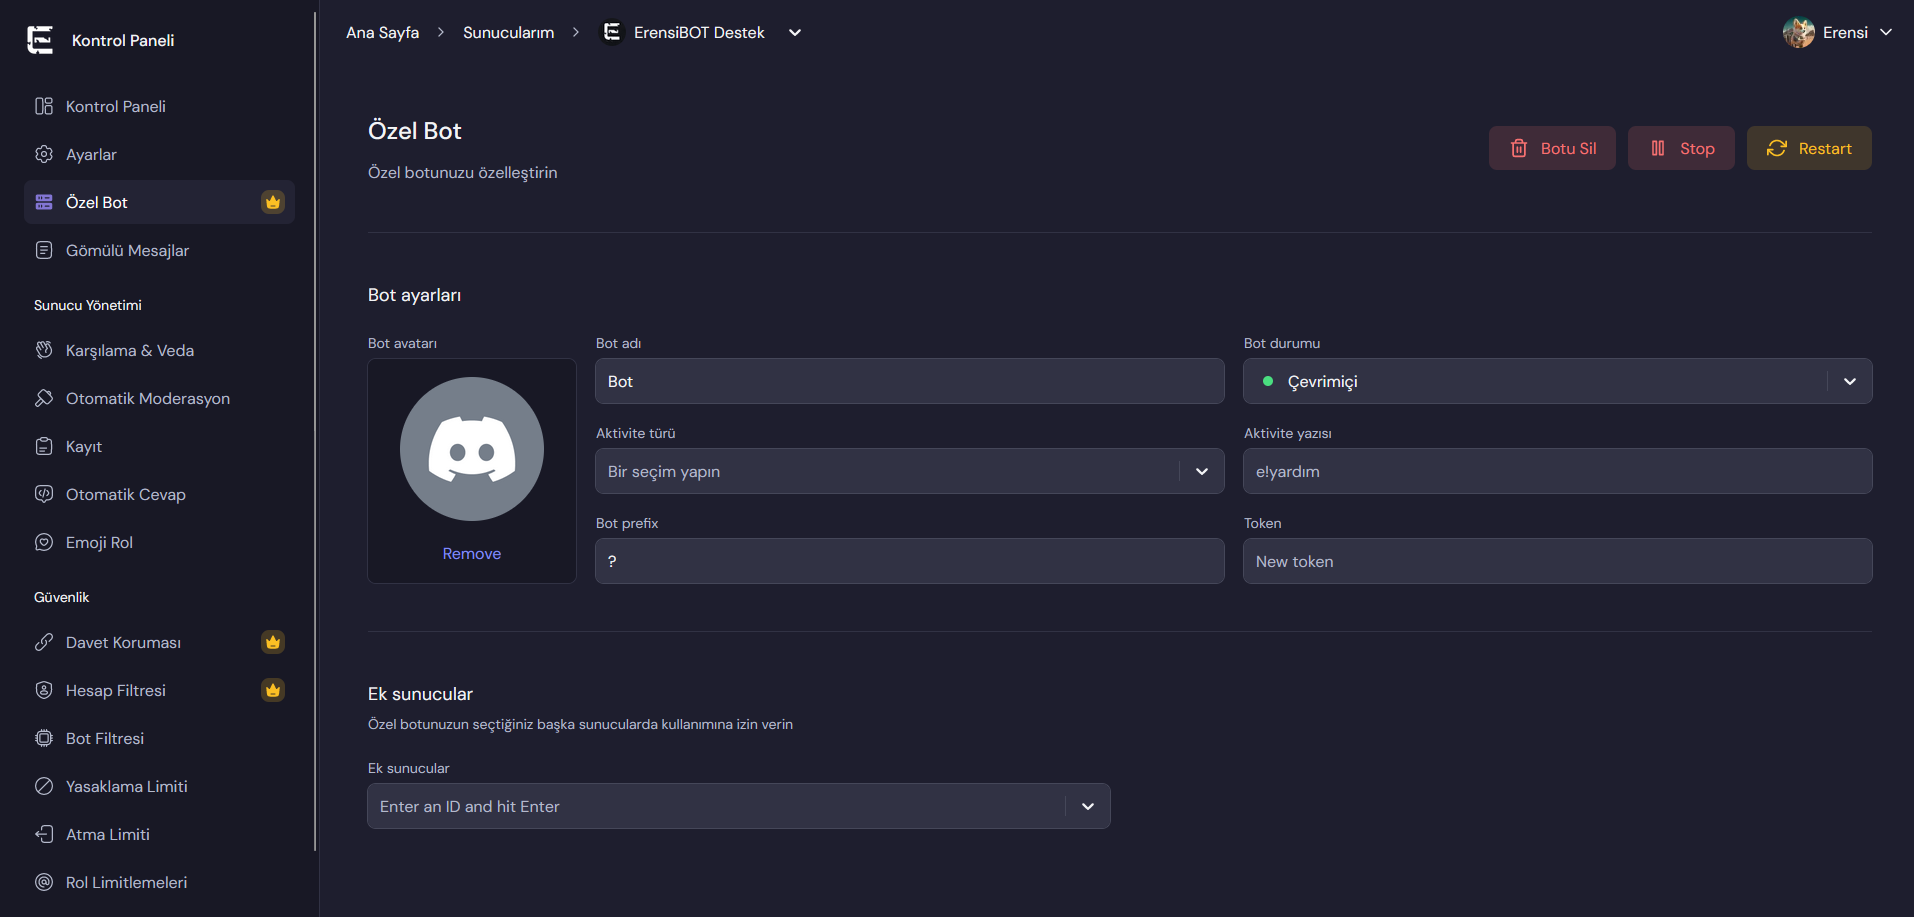
Then, after creating le bot, our Bot personnalisé management panel will appear in front of you. Here vous pouvez set votre bot's name, profile photo, prefix, status, and any additional servers you allow to be added.
Inviting the Bot
There is one last step left to invite le bot to votre serveur and start using it, for this we log in to the Discord Developer Portal again.
- Then click on the "OAuth2" category and select "URL Generator". On the page that opens, click on the "bot" and "application.commands" buttons under the "Scopes" heading.
- We activate the "Administrator" button under the "Bot Permissions" heading right after it.
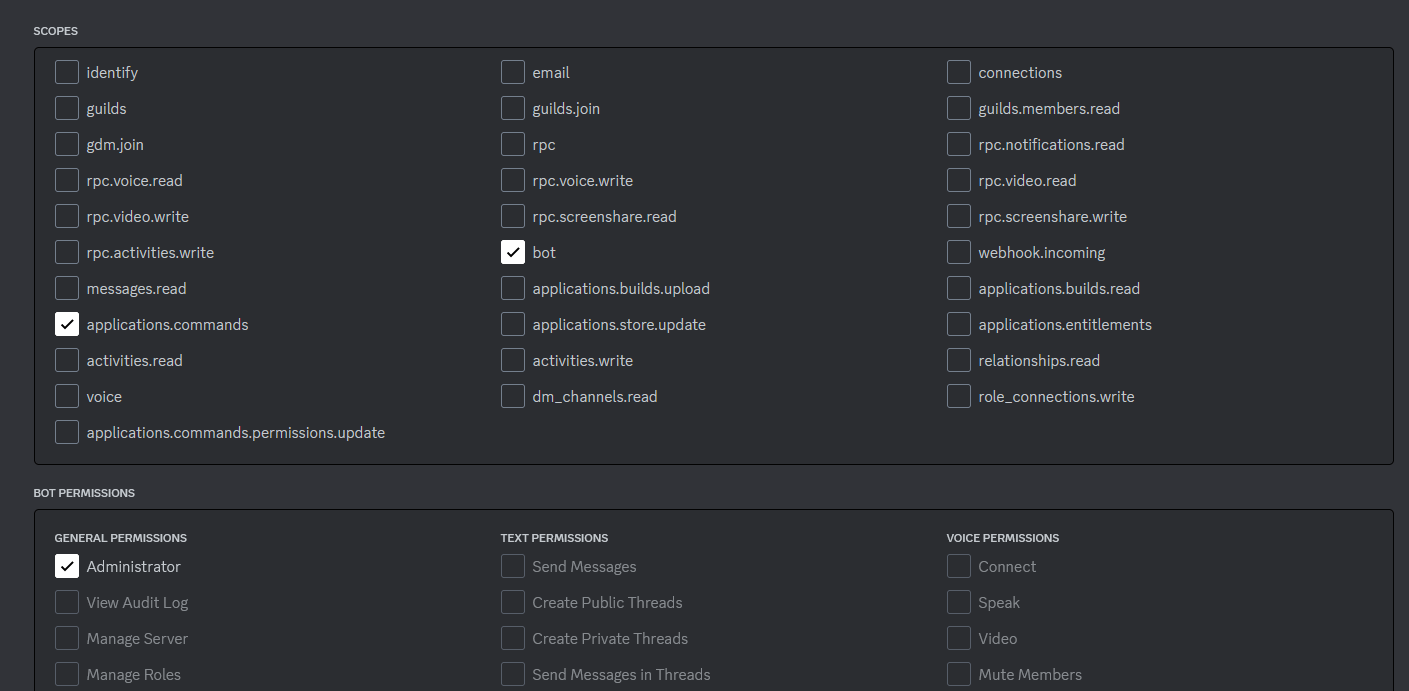
- After making these paramètres, copy the invitation link that appears at le bottom of the page under the "Generated URL" heading. From this link vous pouvez invite votre bot to the servers you allow.
Possible Errors
Follow these steps if votre bot appears to be offline or exiting the server after you have made all paramètres and added votre bot.
If le bot appears offline, you either entered the Token incorrectly or you did not activate the 3 Intents under the "Privileged Gateway Intents" heading. Vous pouvez manage both of these paramètres by selecting votre bot from the Discord Developer Portal and selecting the "Bot" category. When you reset your token, don't forget to update it on our dashboard.
- After resetting your token, placing a new one and checking Intents, vous pouvez restart and activate votre bot from our dashboard. If votre bot is still offline after these steps, please nous contacter at our Support Server.
If it leaves the server when you add le bot, it means that you have not added the server you added to the list of allowed servers from our admin panel.
- The server where you activated your custom bot will be automatically added to the allowed list, vous pouvez add other servers to the list of additional servers from our custom bot management panel and register them.
🎉 Congratulations! Your custom bot is ready
You are ready to embark on a new adventure with us, now vous pouvez manage your custom bot from our admin panel and use the features to your heart's content.
Additional Information
-
After you have invited your custom bot to votre serveur, ErensiBOT will not respond on votre serveur yet, thus avoiding any confusion.
-
Don't forget to move your custom bot's own role to the top of the rôles in the Server Settings > Roles tab. This will prevent any problems with the sécurité systems.
-
ErensiBOT should still be added to votre serveur and should be at the top of the rôles, but there is no problem in removing le bot's permissions and making it invisible in votre serveur.
-
If you want to use our Reaction Role system with buttons with your custom bot, vous devez remove these reaction rôles from our dashboard and add them again.